How To Printing Planner Templates
Tip #1: Software for printing PDF
We recommend printing the planners at a print shop rather than at home or office, as the quality is likely to be higher and more paper size options are available. Nonetheless, it's possible to print the templates at home.
If you want to print the templates at home, then make sure you have:
- Adobe Reader software on your computer. If you don't have Adobe Reader you can download it here (it's free and completely safe): https://get.adobe.com/reader/
- Alternatively, you can use your Google Chrome or Safari browser to open a PDF file and print it out.
Tip #3: Make a test print
Always make sure to do a test print before printing out any large documents or planners containing lots of pages.
Printing Sizes and Formats
Printed in a wrong size
Tip #1: Set scale to 100% and don't use Firefox
Usually printing size settings are set to 'Fit to page' or similar. The resulting template was printed out in the wrong size.
Make sure to always set printing size to '100%' or 'Original size'
If you're trying to print using Firefox, you'll probably get the wrong size. Even if you've set to print in '100%' size, Firefox will use paper size instead.
Do not print PDF using Firefox!
Tip #2: Do not set Pages per sheet more to than 1 in the printer settings
Please choose '2 pages per sheet' settings before downloading our templates.
If you use those settings, you'll get properly formatted print with pages aligned on the front and back sides of the sheet.
If you're trying to print two pages on one sheet using printing dialog - in most cases, you'll get a wrong sized print. The printer's driver will ignore the size of the PDF and will try to fill the page by resizing the original template.
-
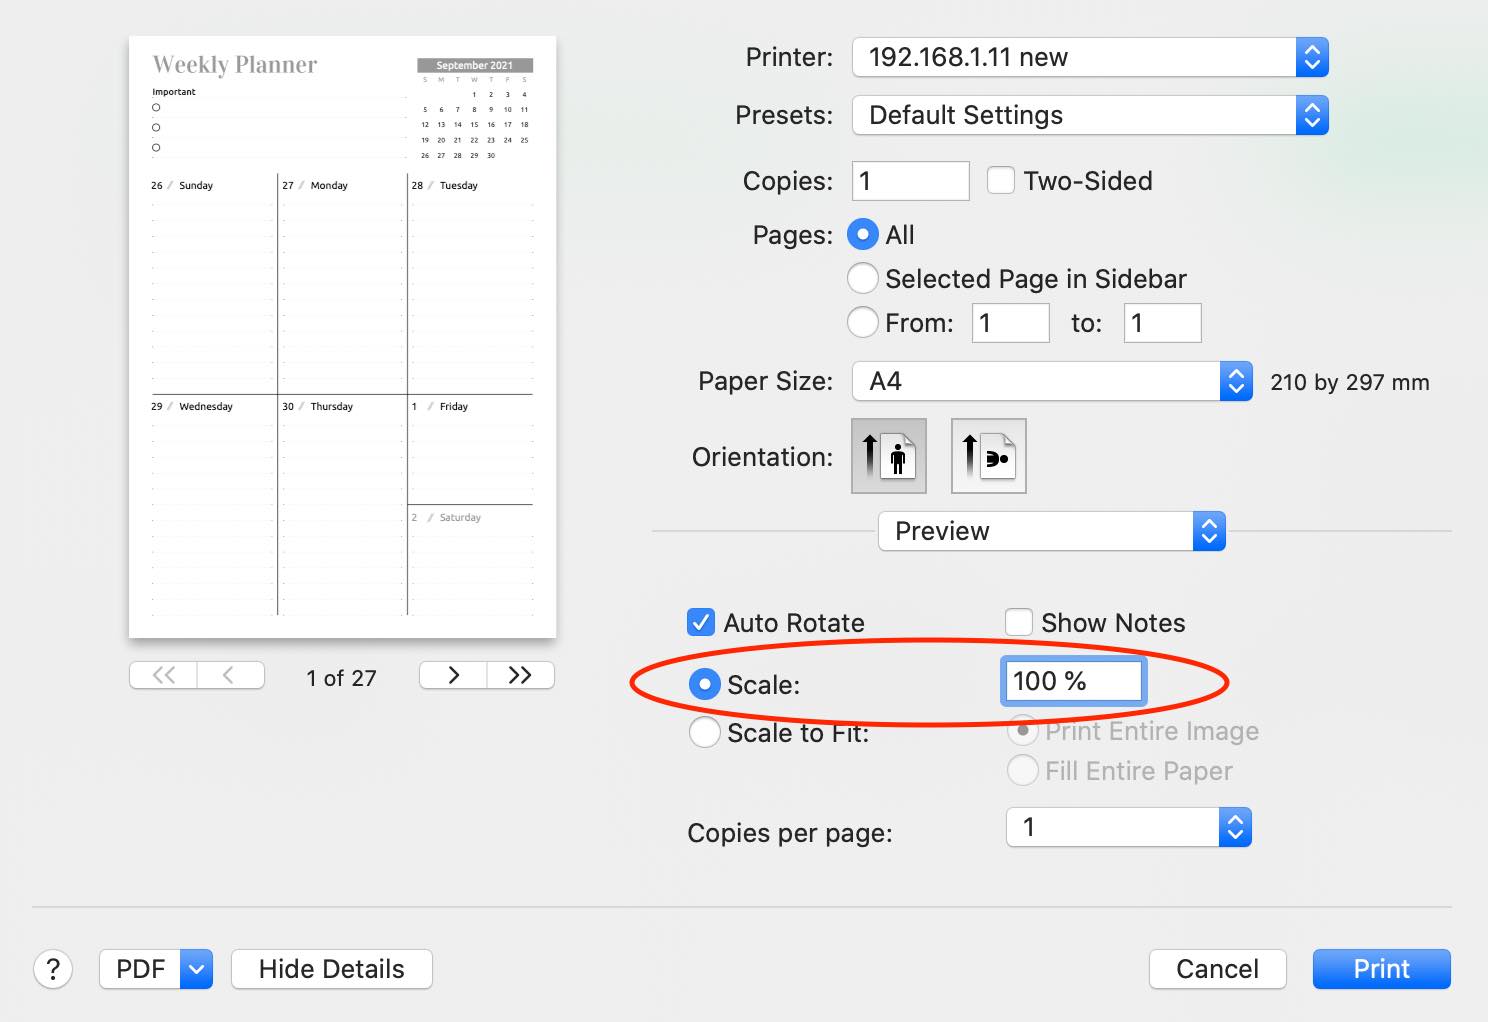
Mac: Preview
Select 'Scale' instead of 'Scale to fit' and set 100%.
-
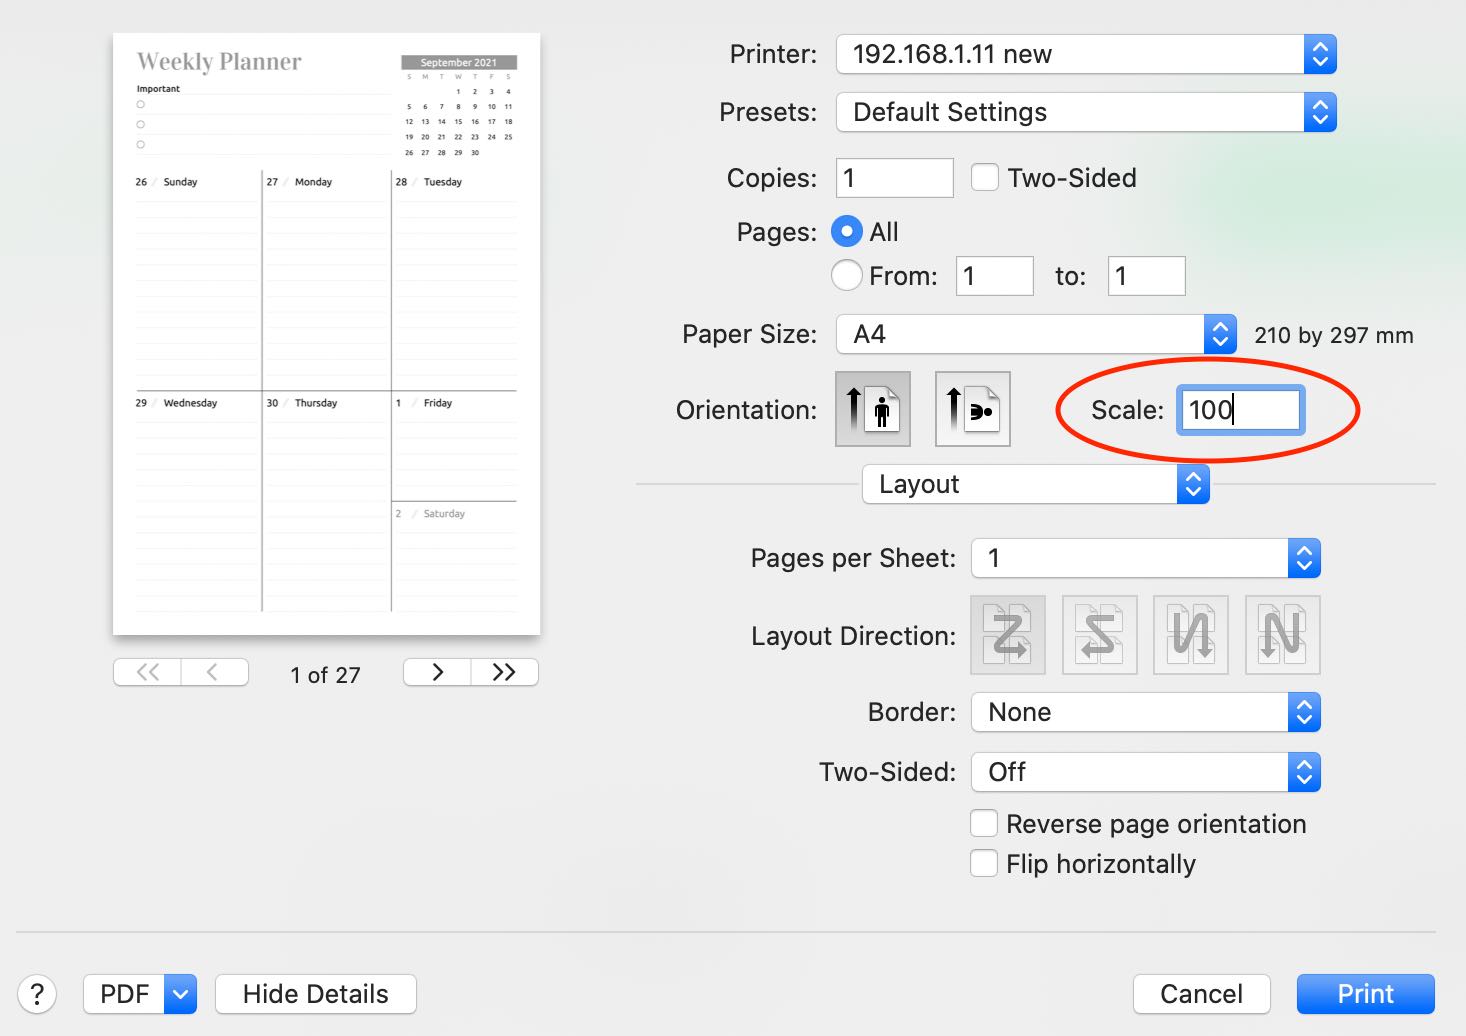
Mac: Safari
Set Scale to 100%
Two-sided printing, booklets
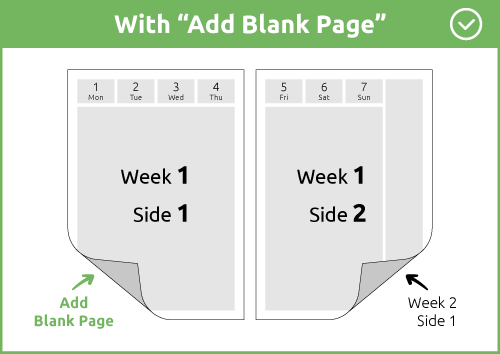
Tip #1: Add blank page
If you're printing a two-pages or dated template - make sure to set the 'Add blank page' checkbox before downloading.
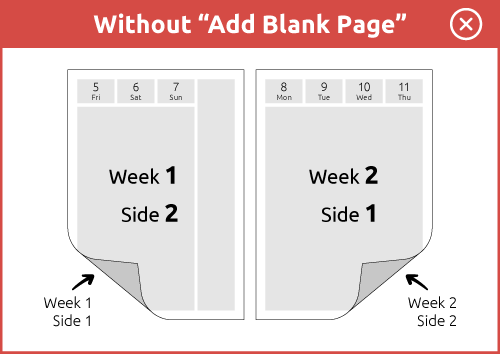
Tip #2: Print booklet using our settings
If you want to print the planner as a booklet - make sure to check 'Booklet' before downloading planner.
In this case you will have proper sized and positioned PDF pages. You don't need to select the 'Booklet' option in your printing system dialog. Print it as regular pages.
Download correct PDF
- Choose the number of pages per sheet and paper size before download
For example: if you choose HappyPlanner Mini 2 pages on A4
We'll build a PDF file with the correct page size, positioning and margins. You can also add cutting marks if needed
- Set 'Booklet' checkbox
- Set 'Add blank page' if you're printing dated or two-pages planner
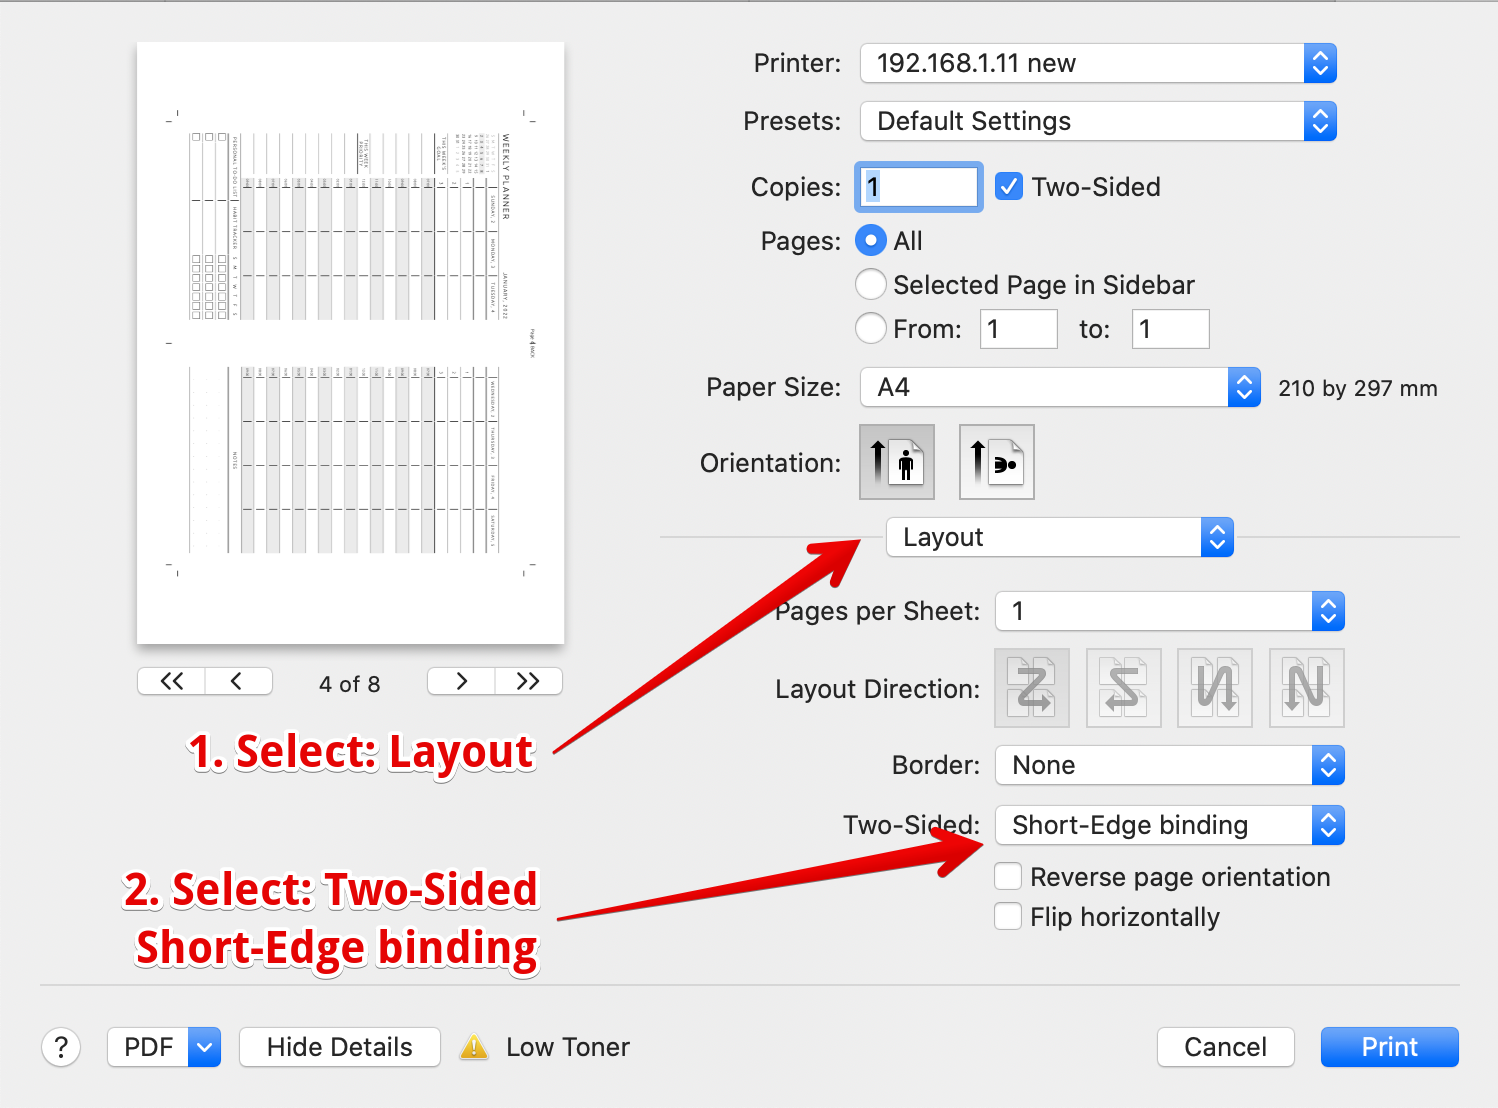
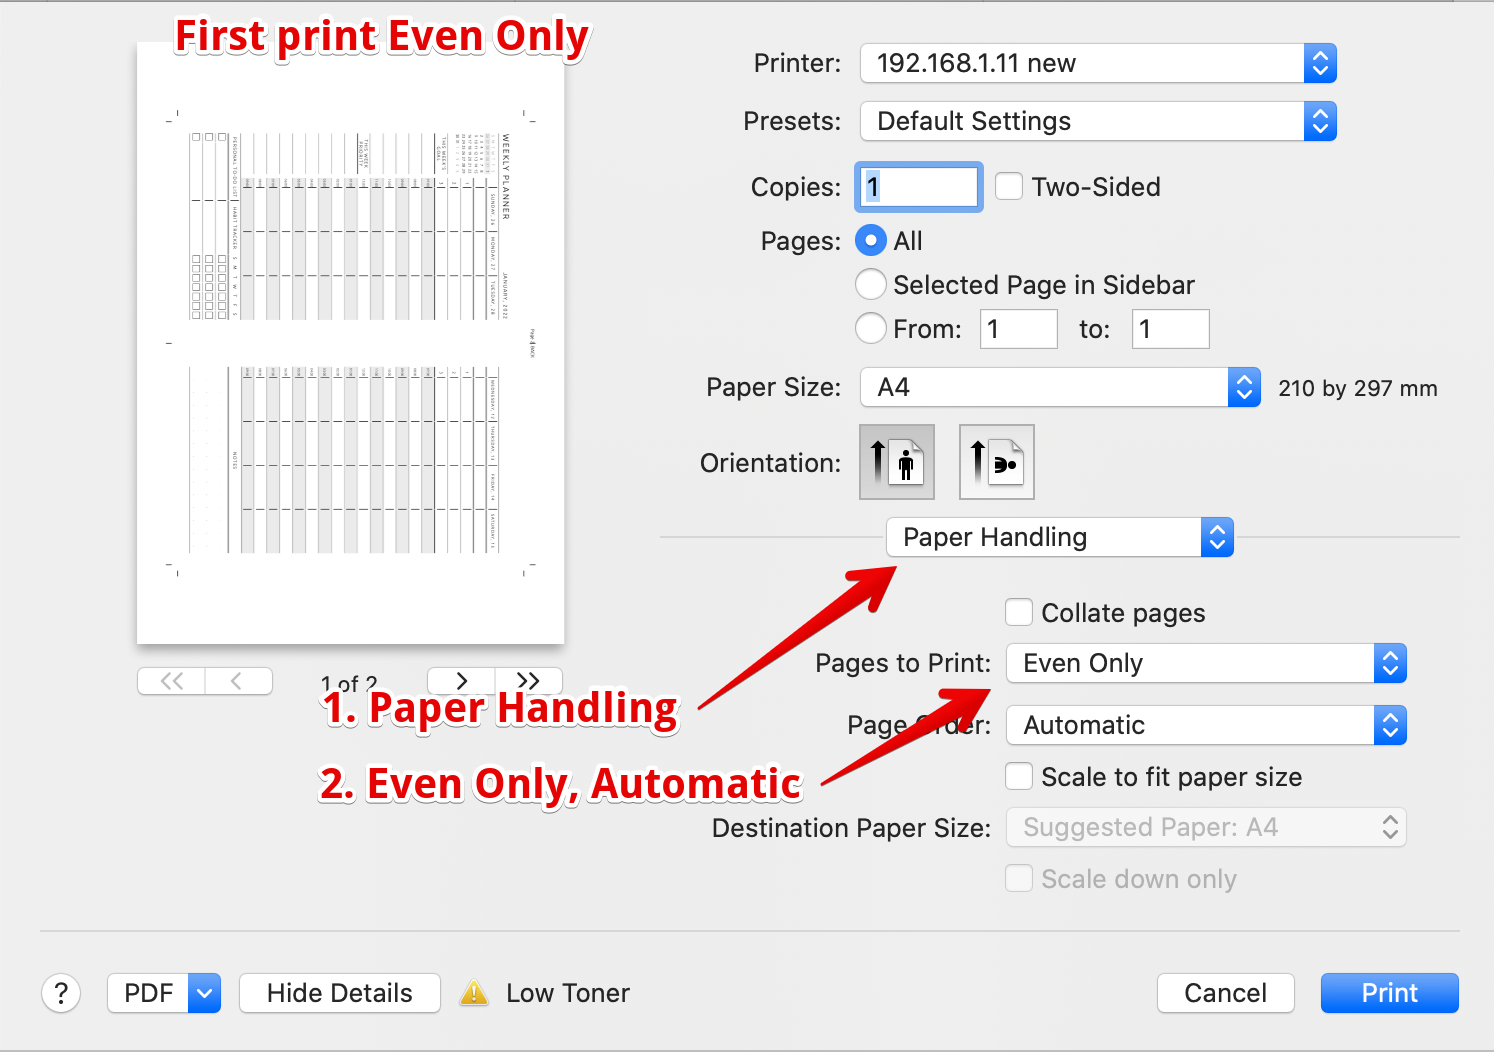
If you have a duplex printer
-
Mac: Preview
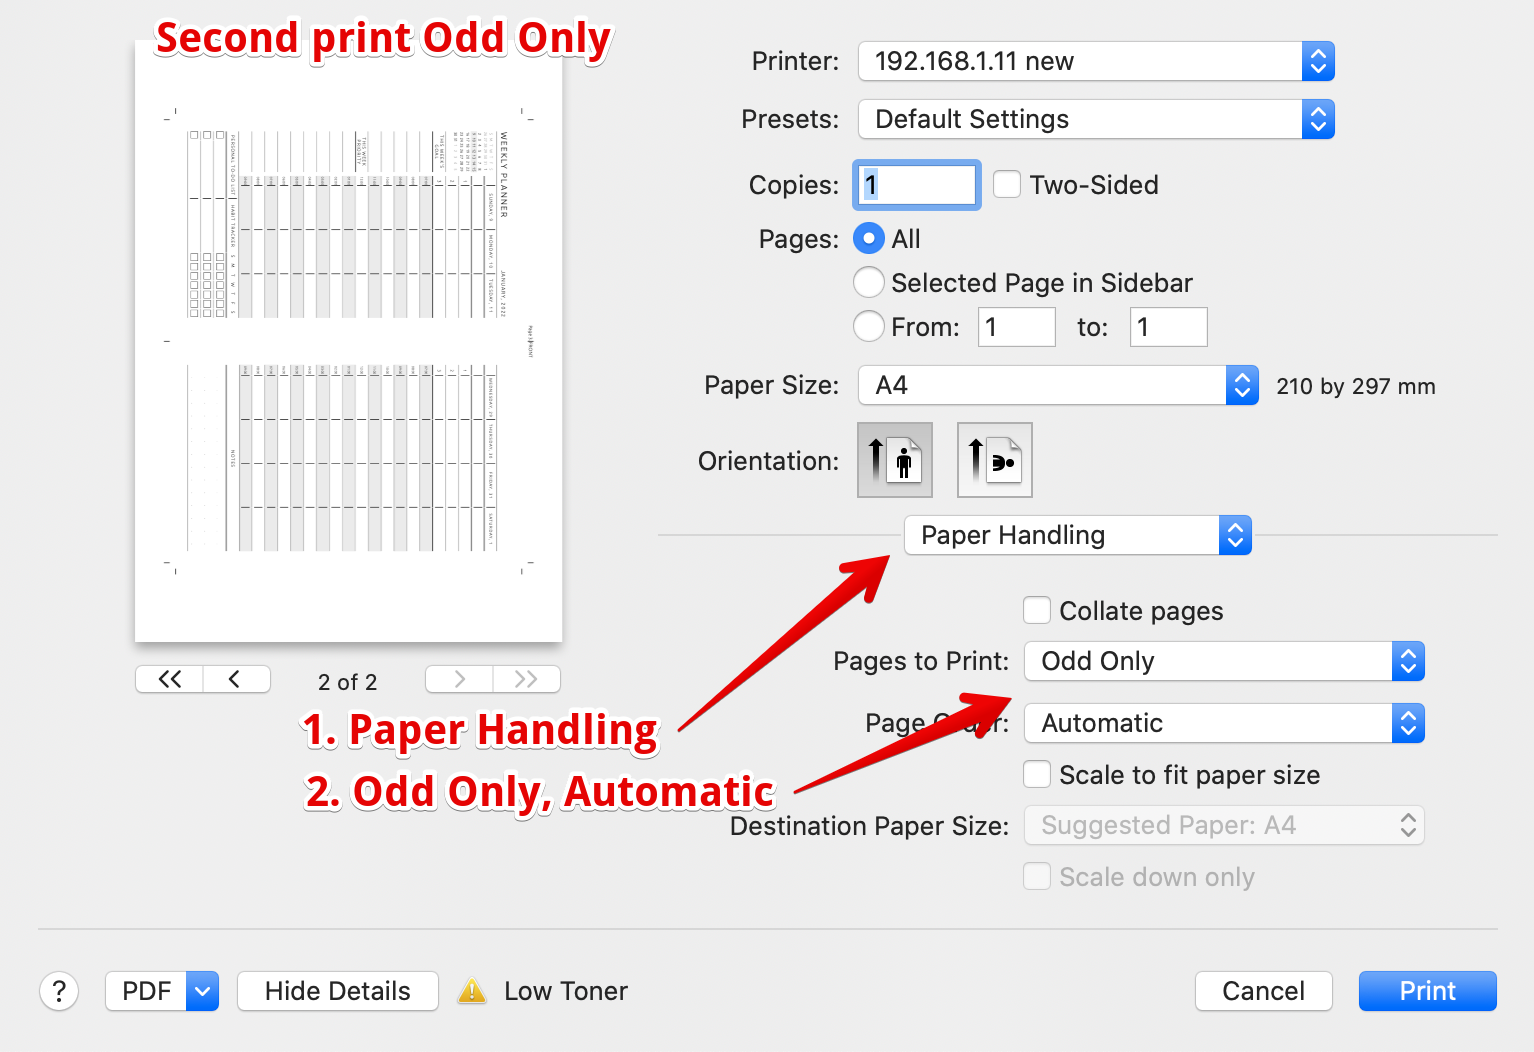
If you do NOT have a duplex printer
-
MacOS: Preview
How to make custom layouts and formats
Tip #1: Download templates as Sticker (transparent image in PNG format)
Download planner as a transparent PNG images.
You can resize and place pages as you need in any text-editing software like Microsoft Word. You can also place two and more pages on a sheet.
Currently not every template can be downloaded as an image. We're working on adding this option to as many templates as possible.
If you need any template that is currently unavailable as an image - please let us know about it in the feuture-request section or just send us a message via contact form.
Bound: Happy Planner, Filofax etc.
Happy Planner Sizes
| Format | Size (inches) |
|---|---|
| Happy Planner Big | 8.5 x 11 inches |
| Happy Planner Classic | 7 x 9.25 inches |
| Happy Planner Half Sheet | 4.125 x 9.25 inches |
| Happy Planner Mini | 4.5 x 7 inches |
| Happy Planner Micro | 3 x 4 inches |
| Happy Planner Skinny Mini | 2.643 x 7 inches |
Filofax Sizes
| Format | Size (inches) |
|---|---|
| Filofax A4 | 8.3 x 11.7 inches |
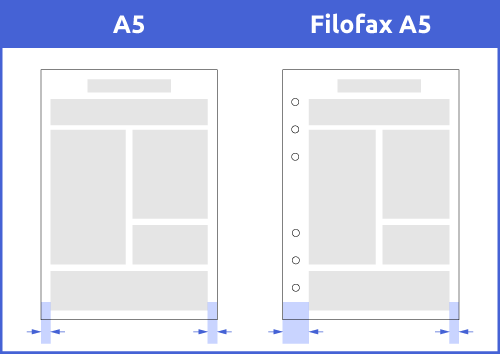
| Filofax A5 | 5.75 x 8.25 inches |
| Filofax Personal/Compact | 3.75 x 6.75 inches |
| Filofax Pocket | 3.25 x 4.75 inches |
Traveler's Notebooks
Travelers Notebook Sizes
| Format | Size (inches) |
|---|---|
| TN A5 | 5.4 x 8.25 inches |
| TN Wide / Cahier | 5 x 8.25 inches |
| TN Midori | 4.33 x 8.25 inches |
| TN Standard / Regular / Narrow | 4.25 x 8.25 inches |
| TN B6 | 4.9 x 6.9 inches |
| TN B6 SLIM | 4.25 x 7 inches |
| TN A6 | 4 x 5.8 inches |
| TN Personal | 3.75 x 6.75 inches |
| TN Pocket / Field Notes | 3.5 x 5.5 inches |
| TN Passport | 3.5 x 5 inches |
| TN Micro | 3 x 4 inches |
| TN Nano | 2.5 x 3.75 inches |
Tip #1: I need to print planner in TN format, but I can't see such an option when downloading
Please choose '2 A5 pages on a sheet' while downloading template. Then scale it using printing dialog.
You can also make a feature request on the TN planners collection. We will add TN size to this template as soon as possible.
Tip #2: How to combine different formats on one sheet?
Download planners as Transparent PNG image and then combine them with Microsoft Word or graphic editor software.
Printing with Adobe Acrobat
-
Step #1
Open your file via Adobe Acrobat. Click “Print” button to open the dialogue window.
-
Step #2
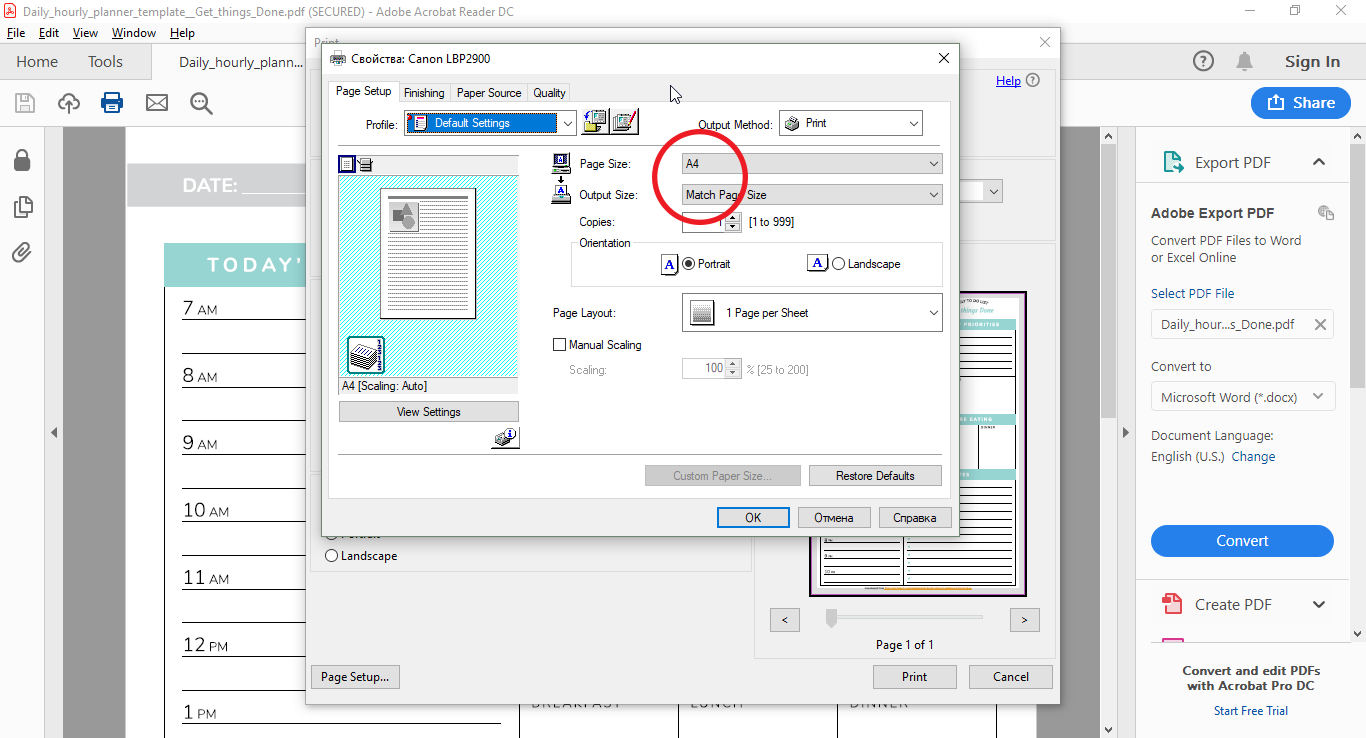
Prepare your printer: Make sure the correct printer is selected and switched on. Make sure your printer is loaded with the relevant paper. Make sure the size of your paper matches the size of the pages of your document. To check or change the size press the Properties button, go to the Paper tab and then set the size to A4 or A5. Click Ok.
Tip #3: Whatever size planner page you are printing, the easiest way to print your pages is to use the same size paper as your file size. This is the secret to hassle-free printing! -
Step #3
Choose how many copies you would like or which specific pages to print.
-
Step #4
Press the 'Size' button and ensure 'Custom Scale 100%' is checked.
-
Step #5
Make sure the orientation is correct. You can choose between the portrait and landscape orientation. Most of the templates come with portrait orientation so make sure your printer uses the same one.
-
Step #6
Check the preview window to make sure it looks exactly how you want it - you can scroll through the pages by pressing the arrows at the bottom. If everything is OK, press print.
Printing with Chrome / Safari
-
Step #1
Open your file via Google Chrome or Safari. Click “Print” button to open the dialogue window.
-
Step #2
Prepare your printer: Make sure the correct printer is selected, and it's switched on. Make sure your printer is loaded with the relevant paper. Make sure the size of your paper matches the size of the pages of your document. To check or change the size press the “More settings” button and set the desired paper size to A4 or A5.
-
Step #3
Choose if you want to print all the pages in the document or any specific pages.
-
Step #4
Check the preview window to make sure it looks exactly how you want it.
-
Step #5
If everything is OK, press print.
How to remove watermark from my template
All the free templates come with OnPlanners watermark.
However, you can always remove it by upgrading the particular template or purchasing a premium access to full collection of 1000+ premium, watermark-free and editable tempalates for only $14.97.

